“Downscaling” SupervisorControlPlaneVM’s from three to two nodes
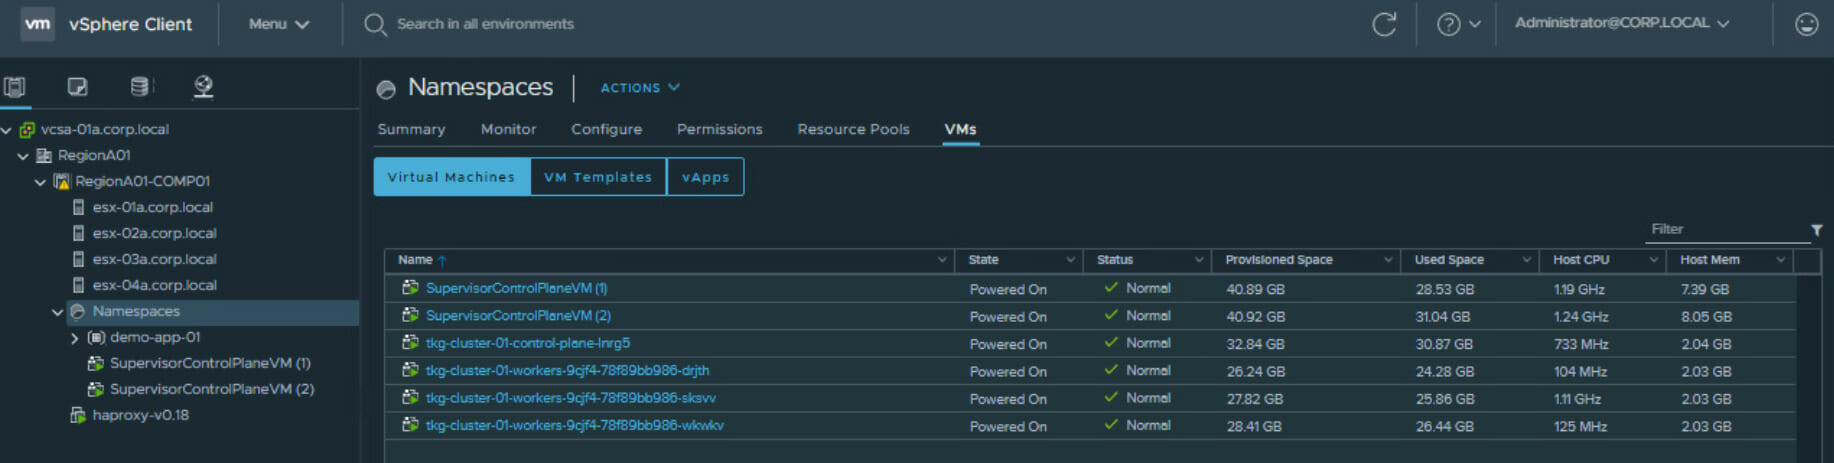
When enabling WCP (Workload Platform) on your vSphere cluster, by default 3 SupervisorControlPlaneVMs (SV) will be deployed. (Those VMs are also sometimes referred as "agents")
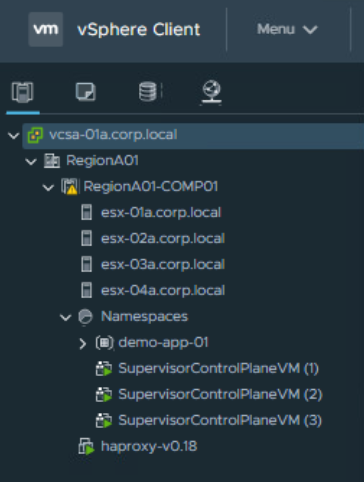
3 SV VMs in default deployment, used HOL for screenshot
Those VMs contain a Kubernetes cluster used to:
- provision your pods on your ESXi hosts,
- to provision your TKC (Tanzu Kubernetes Cluster), also known as "Guest Cluster"
Reducing nodes
If you’re using this in your lab, you might already know that the control plane VMs can be reduced to 2 nodes by modifying the wcpsvc.yaml of the wcp service on the vCenter.
As the smallest deployment size has 2 vCPUs, 8 GB RAM and 75 GB disk, you can safe same resources in a lab.
However one caveat is that once vCenter will be updated, the change is reverted and the third Supervisor VM will be deployed again. To reduce the nodes to two, you had to re-do the configuration change and re-deploy WCP. If already running workload, this can result in quite some work.
Services
As far as I understand, three components are majorily involved when deploying those Supervisor VMs:
-
wcpsvc
- The WCP service on vCenter shares data between the Kubernetes cluster inside the Supervisor-VMs and the vCenter. This allows to see the namespaces in your vCenter UI.
- Also, this service tells EAM how many SV VMs we want and orchestrates the update.
-
EAM (ESXi Agent Manager)
- This service deploys the agent VMs and ensures the configured amount of VMs are present. (One deployment is referred to as "agency")
-
Kubernetes within Supervisor Control Plane
- The kubernetes cluster orchestrates pods across all nodes, required to provide its functionality. We’re going to interact with this one later on.
The magic
Disclaimer: Before proceeding, please note that this is absolutely NOT supported and is not suitable for production environments. If proceeding, you should also be prepared to redeploy WCP at any point if something doesn’t work as expected. You have been warned.
Enough theory. Let’s do some magic.
As usual: Backup is advised.
When downscaling the SupervisorCluster we go through multiple steps:
- Adjusting the wcpsvc.yaml configuration
- Preparing Supervisor VM deletion
- Removing the Kubernetes node from the Kubernetes cluster
- Downscale the deployment replicas inside the Kubernetes cluster
- Cleaning up failed pods due to node removal
- Deleting one SupervisorControlPlaneVM and make sure it’s not going to be re-deployed
- Finish/Final note
1. Adjusting WCP configuration
First, we change the wcpsvc.yaml configuration file to set minmasters and maxmasters from 3 to 2 nodes. Then restart the service so that changes take effect.
I have prepared some easy commands to copy:
cp /etc/vmware/wcp/wcpsvc.yaml /etc/vmware/wcp/wcpsvc.yaml.bak
sed -i 's/minmasters: 3/minmasters: 2/g' /etc/vmware/wcp/wcpsvc.yaml
sed -i 's/maxmasters: 3/maxmasters: 2/g' /etc/vmware/wcp/wcpsvc.yaml
service-control --restart wcp
Don’t close the SSH session to vCenter yet.
2. Prepare SupervisorVM deletion
-
Go to
Namespacesand expand the resource pool. -
Select one
SupervisorControlPlaneVMof your choice. (Personally I prefer the VM with the highest number). -
Remember those two details. We will need them later:
- Note the
DNS Nameof the VM in the VM overview:421317fd7b899d0c083a0eef0a0920a3 - Check the
Noteson the right, note down theEAM Agencyvalue:vmware-vsc-apiserver-5cb6jm.
- Note the
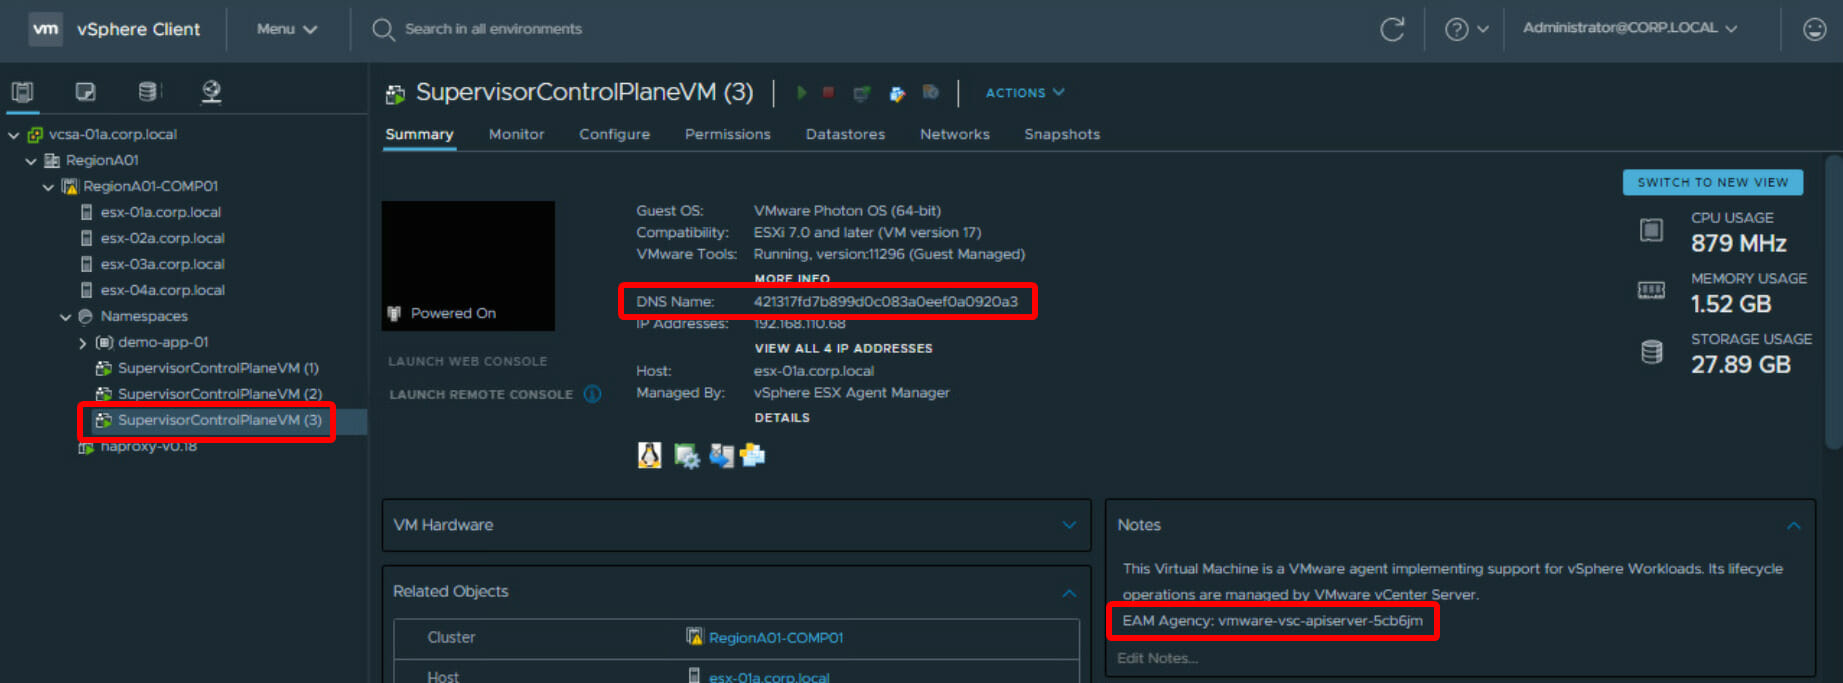
Note SupervisorVM details: “DNS Name” and “EAM Agency”
3. Remove the node from the Supervisor Cluster
-
Connect to the vCenter, if required.
-
Now we want to connect from the vCenter to the SupervisorControlPlane: Run
/usr/lib/vmware-wcp/decryptK8Pwd.pyto get the IP address as well as the credentials for the SSH session we’re going to use. -
Connect via SSH via
ssh root@IPand enter the password as presented before.
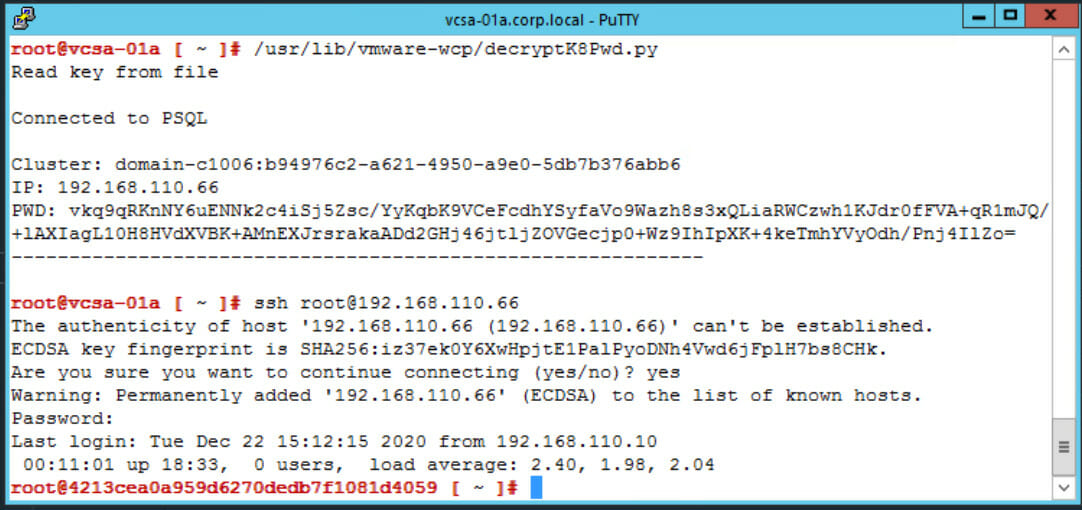
Connect from vCenter to SV VM via SSH
- Check the nodes in the cluster by running
kubectl get nodes. You should see three nodes – for example:
# kubectl get nodes
NAME                               STATUS  ROLES    AGE   VERSION
421317fd7b899d0c083a0eef0a0920a3   Ready   master   13d   v1.19.1+wcp.3
422fef3abcb1c10fce7f3ab657e58125   Ready   master   13d   v1.19.1+wcp.3
422fef3ch2b1c50fce8f3ca473b51681   Ready   master   13d   v1.19.1+wcp.3
Search for the DNS Name we’ve seen in the prior step: In this case the first node is the one we’re searching for: 421317fd7b899d0c083a0eef0a0920a3.
- Now we "cordon" (preventing new pods to be deployed on the host), "drain" (clear the node from workload) the node and finally delete it:
kubectl cordon 421317fd7b899d0c083a0eef0a0920a3
kubectl drain 421317fd7b899d0c083a0eef0a0920a3 --ignore-daemonsets
kubectl delete node 421317fd7b899d0c083a0eef0a0920a3- When we repeat
kubectl get nodesnow, we only see two nodes.
4. Downscale deployment replicas
-
Make sure you’re connected via vCenter to your Supervisor CLuster.
-
Run
kubectl get deployments -A.You will see, that most deployments have 2 out of 3 pods running. There are several pods which should run three times across the cluster, one pod on each node. But as we deleted one, we’ll need to reduce the replicas. Ending up with "2/2 Ready".
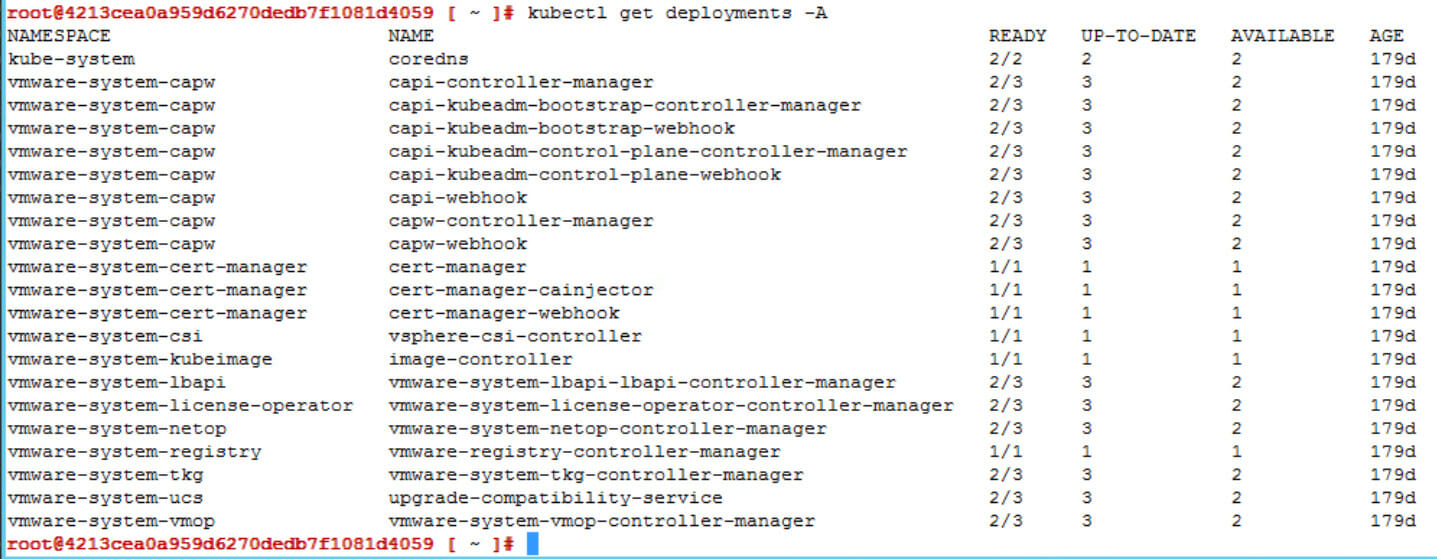
Kubernetes Deployment, 2/3 Pods Ready
- To reduce the replicas of the deployments from 3 to 2, we would need to edit all deployments manually. Luckily for you, I pre-crafted an one-liner. So, run this command:
bash <(kubectl get deployments -A -o json | jq -r '.items[] | select(.metadata.namespace | (startswith("vmware-system-") or contains("kube-system"))) | select(.status.replicas == 3) | "kubectl scale deployments/\(.metadata.name) -n \(.metadata.namespace) --replicas=2"')(Tip: If you remove bash <( and the ) at the end, you will see all commands printed to the terminal, without being executed.)
- When running
kubectl get deployments -Aagain, we now see that we have 2/2 pods in the READY state. Success.
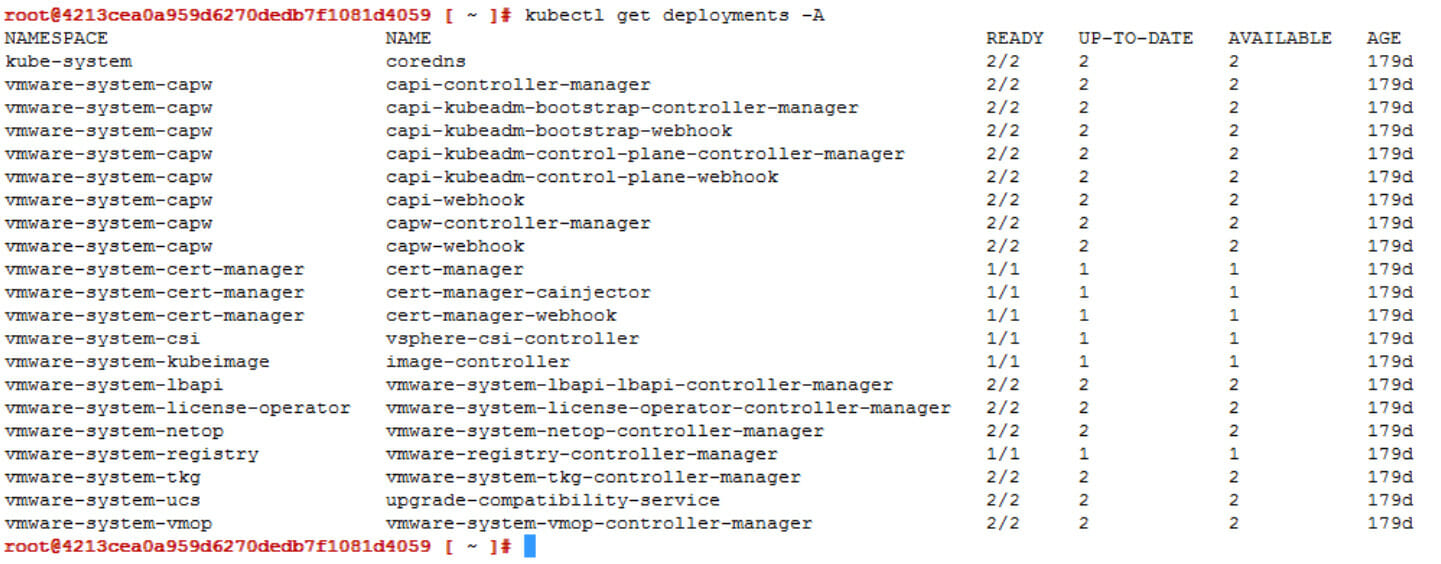
Kubernetes Deployments, 2/2 PODs READY
5. Cleaning up pods
In some instances kubectl get pods -A will show many pods as failed with error NodeAffinity. This is because Kubernetes tries to schedule pods on the node we removed earlier.
I have seen this behavior so far only with WCP v1.18.2, but not with v1.19.1 I’m using currently in my own lab.
To cleanup all of these pods, you can run: (This deletes those failed pods, and only from system namespaces)
bash <(kubectl get pods -A -o json | jq -r '.items[] | select(.metadata.namespace | (startswith("vmware-system-") or contains("kube-system"))) | select(.status.phase == "Failed" and .status.reason == "NodeAffinity") | "kubectl delete pod \(.metadata.name) -n \(.metadata.namespace)"')(Tip: If you remove bash <( and the ) at the end, you will see all commands printed to the terminal, without being executed.)
6. Deleting SV VM
As the WCP service now only expects a 2-node kubernetes cluster and we have removed the node from the Kubernetes cluster, we can go ahead deleting the one Supervisor VM we’ve chosen.
- Go to
Menu - Administration. ThenSolutions - vCenter Server Extensionsand click on the relevantvSphere ESX Agent Manager.
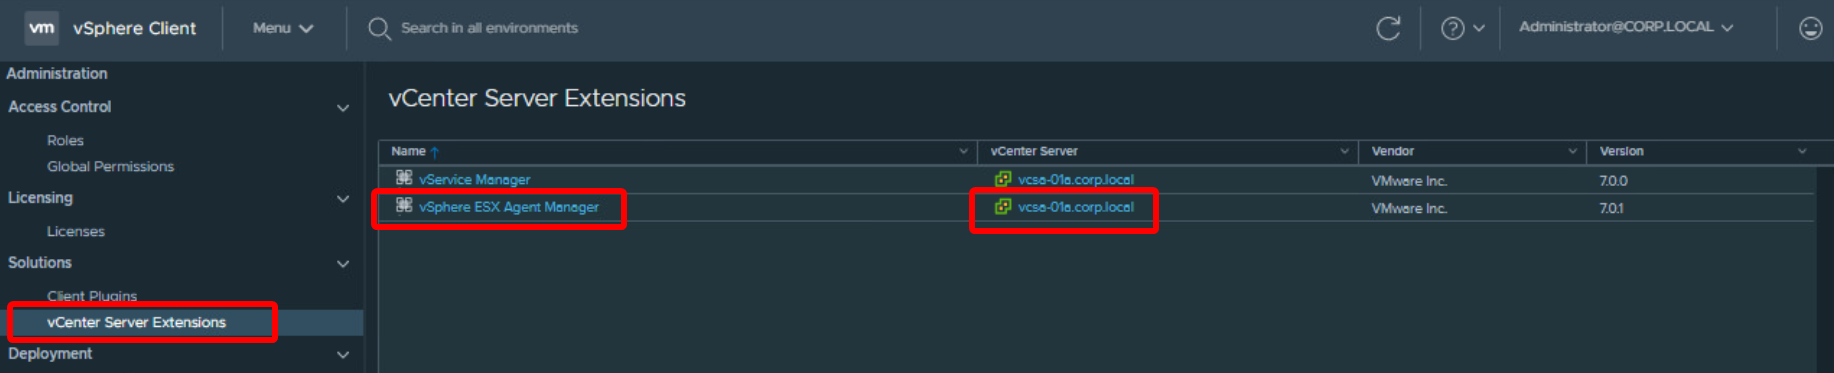
Open “vSphere ESX Agent Manager”
-
Click on the
Configuretab and take a closer look on theAgencycolumn. -
Select the
Agencywith the name you have seen in theNotesearlier, sovmware-vsc-apiserver-5cb6jmin this case. Click on the 3-dots icon and clickDelete Agency. Confirm the deletion. -
Just after confirming you will see two tasks in vCenter:
Initiate guest OS shutdownandUninstall agent. Now EAM does the work for us removing the Supervisor VM.
7. Finish/Final note
As previously noted, this is absolutely not supported. I have performed the steps multiple times in the Hands-On-Labs HOL-2113-01-SDC - vSphere with Tanzu with success and also haven’t experienced any issues in my local lab.
Personally I think that these steps look more difficult than they are. After multiple runs this is done in like 5-10 minutes, which is faster than re-deploying WCP and all workload for sure. If you use this way or re-deploy WCP after a vCenter update is still up to you.
Any feedback appreciated. If there are further questions, please let me know in the comments.

Harbor registry doesn’t work after vCenter update and rescaling using this method. Harbor also fails re-deployment so it cannot be used without redeploying workload management probably.